Tuesday, October 14, 2008

ROUTER SETTING

Another common thing that many people thought it is hard to do. But actually in just a few simple steps, its done. And as for Streamyx user, when they ask for TM installer to install and setting the modem for their connection, do you know how much does it cost?RM88!!
Instead of asking for someone to do this for you and wasting up of your money,you can learn to setting the router yourself here.
The list of settings will be updated time by time for different routers.

1. BILLION (check the IP , username and password here)

  • Key in the IP address of the router,enter the username and the password of the router
  • Click on "Interface Setup" and enter these values: VPI=0, VCI=35, username@ispname, password, Encapsulation = PPPOE LLC.
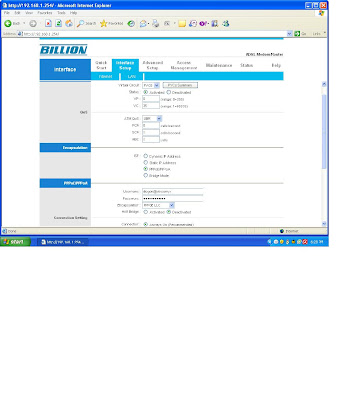
  • Go to Maintenance>Sysrestart>Choose Current Setting.

Vista Dialer

Windows Vista is a line of operating system developed by Microsoft for use on PCs, including home and business . On January 30, 2007, it was released worldwide, and was made available for purchase and download from Microsoft's website. The release of Windows Vista came more than five years after the introduction of its predecessor,Windows XP, the longest time span between successive releases of Microsoft Windows.[Wikipedia]

As for today I will just post on how to create the dialer for Windows Vista as well as the steps to set the DNS number on your Vista.
1. Go to Control Panel>Network and Sharing Center>Click 'Set Up A Connection or Network'

2. Choose 'Connect To The Internet'
3. There will be 3 choices which are Wireless, Broadband and Dial-Up. As for now, I will show the steps for creating a manual dialer for broadband connection.

4. Key in your username@ISP and your password and click Connect.

5.DONE!

Then, for the DNS setting as well as to change the setting for your IP address, subnet mask and default gateway,just follow these simple step.

THANK YOU AND HAPPY SURFING!

Saturday, October 4, 2008

Streamyx Combo Goes Mobile COUNTRYWIDE

###################################################################

*Looking for a good web host? Checkout the Bluehost Review

*Looking for data recovery service? Click here

*Looking for software help desk? Check this out

*Looking for anti spam solutions? Checkout the Syronex

*Looking for broadband phone service provider? Visit this website

*Get your Free book on mesothelioma treatment by submitting your information here.

###################################################################

Streamyx Combo Goes Mobile - It is COUNTRYWIDE
With as low as RM70,you can do a lot of things online,everywhere!
Surfing, Chatting, joining Yahoo Web Hosting, purchase Domain Names, Making Money Online, Broadband phone service, joining Affiliate Programme /Pay Per Click Affiliate, VOIP phone service, Conference calling, Blogging and many more!
Subscribe Streamyx with Mobility offerings - Free Wireless ADSL Modem.
Streamyx Zone Unlimited - RM10 per month will be charge to customer as long as they subscribed Add on Mobility package.
Just ADD ON RM10/month for the following package,enjoy the mobility COUNTRYWIDE!


Wait!There are more exciting features given:
  • FREE Wireless Modem
  • Broadband access @ streamyx ZONE locations.
  • Single login ID
  • FREE italk buddy account @ www.italkbuddy.com.my
*Streamyx Combo is a package offering and no separate charge for TM fixed line rental.

To check the countrywide streamyxzone location, click here
To subcribe or register, you can do so at:

1) TMpoint outlets countrywide

2) Streamyx authorised resellers

- You can email the reseller at madridista_03@yahoo.com or fax your copy of IC to 0377274043 or call/sms 0122223414. Then,all you have to do is just sit and relax while your account being registered.

3) Clickers Authorised Service Outlets (CASO) outlets

4) TM Consumer Sales.


TROUBLESHOOTING FOR FREQUENT DISCONNECTION

Frequent Disconnection is a problem where your connection will get disconnected itself in the interval of 2 seconds to 30 minutes. When it get disconnected, your DSL/Link LED light at your modem will be blinking and in a few minutes it will be stable again as the connection back to normal.
The complication is:
  • You will always have to wait for the modem/router to dial back to get the connection.
  • The worst case is the connection last no longer than 1 minute. You will not be able to do your works if this happen.
  • Sometimes, if you do not notice that you are having this kind of problem, you will suspect that the connection received from your ISP is extremely slow.

The cause of the problem could be from your end or from your ISP (TMnet)end. To check, just follow these troubleshooting steps:

1.Check the SNR ratings in your DSL Parameter

  • Login to your modem/router page
  • Check under the WAN tab
  • Check the local SNR and remote SNR margin. The higher the result,the better your connection goes.

28 and above = Your line is in GOOD condition.
Lower than 12 = WORST. The best solution is to ask for technical test from your ISP (call 100 for TM/STREAMYX) and most of the times, they will do a new wiring for your line.

  • As for Attenuation, it should not exceed 48dB
2. Check LAN cable - make sure the network cable is connected properly from your modem to your network card slot.
3. Check telephone line quality - make sure there is no noisy/cracking sound when you pick up the phone.
4. Bypass splitter - do not use the splitter and try the connection.If the connection become stable without the splitter, your splitter might be faulty and you need to get a new one if you still wanna use your phone line.
5. DNS Setting

  • 202.188.0.133 (Primary)
  • 202.188.1.5 (Alternate)

6. Scan your system with the antivirus - to make sure the system is not infected by virus where sometimes it can disconnect your connection to the server.
7. Disable antivirus software - OFF the antivirus and run the connection again. Check whether the problem still exists or not.
8. Stand alone connection ,No parallel connection and No sharing fax

That's it!! If after all the se troubleshooting have been done but the problem still persist, just contact your ISP ( call 100 for Streamyx user) to lodge a report. To speed up the process, just mention all these troubleshooting and they will straightaway compile a new report for you.


###############################################################

*Looking for a good web host? Checkout the Bluehost Review
*Looking for data recovery service? Click here
*Looking for software help desk? Check this out
*Looking for anti spam solutions? Checkout the Syronex
*Looking for broadband phone service provider? Visit this website


Thursday, September 18, 2008

Modem and Router Passwords

For the advance user who know how to configure their modem/router,this would be helpful.
Here are the list of the default password for different modem/router ( All are Streamyx supported) :

1. RIGER DB102 ( Most of the customers who register nowadays will get this type of modem)
  • IP Address: 192.168.1.1
  • username : tmadmin
  • password : tmadmin

2. BILLION modem:
  • IP Address: 192.168.1.254
  • username: admin
  • Password: password

3. ZTE modem
  • IP Address: 192.168.1.1
  • i. username: ADSL
  • password: expert03
  • ii. username: ZXDSL
  • password: ZXDSL
  • iii.username: admin
  • password: telekomst

4. ARTNET modem:
  • IP Address: 192.168.1.1
  • i. username: admin
  • password: 1234
  • ii. username: admin
  • password: telekomst
  • iii. username: admin
  • password: admin
  • iv. username: admin
  • password: password

5. AZTECH modem:
  • IP Address: 10.0.0.2 OR 192.168.1.1
  • i. username: admin
  • Password: admin
  • ii. username: admin
  • Password: password
  • iii. username: admin
  • Password: blank ( type "blank,not leave the column blank)

6. KASDA modem:
  • IP Address: 192.168.1.1
  • username: admin
  • password: telekomst

7. D-LINK
  • IP Address: 192.168.1.1
  • username: admin
  • password: admin

8. TRIZ modem:
  • IP Address: 192.168.1.1
  • username: admin
  • password: aaaaaaaa

9. TP-LINK :
  • IP Address: 192.168.1.1
  • username: admin
  • password: admin

10. HUAWEI:
  • IP Address: 192.168.1.1
  • i. username: admin
  • ii. password: admin

Any additional info about other modems or routers, just leave the comment.Thanks!

###############################################################

*Looking for a good web host? Checkout the Bluehost Review

*Looking for data recovery service? Click here

*Looking for software help desk? Check this out

*Looking for anti spam solutions? Checkout the Syronex

*Looking for broadband phone service provider? Visit this website


Create Manual Dialer

Here I will show you the basic thing in order to make connection.
Actually, there are 2 types of connection setting:

i. Automatic connection- router has been configured with the setting required and will act as a dialer. No need to manually dial everytime the user want to make connection.This is the most convenient and preferred way by most of the user in order to get Streamyx connected.

ii. Manual dialer - This either the user do not own a router or simply choose to dial manually everytime to get connected to Streamyx.

As it would be appropriate for us to get start from the basic, I will show the steps on how to create manual dialer first.

1.Click on Start button>All Programs>Accessories>Communications>New Connection Wizard

click on the image to enlarge the picture
Free Image Hosting at www.ImageShack.us

or alternatively, Go to Control Panel(Classic View)>Double-click on Network Connection>click on Create New Connection Wizard
Free Image Hosting at www.ImageShack.us

2. New Connection Wizard window will appears stating "Welcome to the New Connection Wizard" > click on Next

click on the image to enlarge the picture
Free Image Hosting at www.ImageShack.us

3. Choose the 1st one- 'Connect to the internet'

click on the image to enlarge the picture
Free Image Hosting at www.ImageShack.us

4. Choose the 2nd one- 'Setup my connection manually'

click on the image to enlarge the picture
Free Image Hosting at www.ImageShack.us


5. Choose 'connect using a broadband connection that requires a username and a password'

click on the image to enlarge the picture
Free Image Hosting at www.ImageShack.us


6. Fill in ISP name- this will be the name of the dialer (If you type ABC,then ABC will be set as the name of the dialer),usually 'Streamyx' is preferred.

click on the image to enlarge the picture
Free Image Hosting at www.ImageShack.us


7.Key in the username(case sensitive),password and confirm password.Username format is "username@streamyx". Also tick the 2checkboxes

click on the image to enlarge the picture
Free Image Hosting at www.ImageShack.us


8. Completing the new connection wizard > Tick add a shotcut to this connection to my desktop > Click Finish

click on the image to enlarge the picture
Free Image Hosting at www.ImageShack.us


9. Go to desktop > double click on the dialer

click on the image to enlarge the picture
Free Image Hosting at www.ImageShack.us


User also can access the dialer at Network Connection > Double click the dialer
Free Image Hosting at www.ImageShack.us


10. The connection window will pop up > Just click connect as the username and password has been saved while setting the dialer.

click on the image to enlarge the picture
Free Image Hosting at www.ImageShack.us

###############################################################

*Looking for a good web host? Checkout the Bluehost Review

*Looking for data recovery service? Click here

*Looking for software help desk? Check this out

*Looking for anti spam solutions? Checkout the Syronex

*Looking for broadband phone service provider? Visit this website

Limited or No Connectivity

Have you ever facing Limited Or No Connectivity problem with your network?
or your network connection gets stuck "Acquiring IP Address"?
Why is it happen and how to fix it?

Limited or No Connectivity is due to assigning problem between IP to your LAN Connection.
By right, your IP should be assign with the 192.168.x.x but it assign an IP which in group 168.x.x.x .
(you can check this by running Run>cmd>ipconfig)

click picture to enlarge
Free Image Hosting at www.ImageShack.us


Many user just simply disable the message by untick the "Notify me when this connection has limited or no connectivity" check box", this basically would not solve the problem.
Do you understand what does "notify" means? I'm pretty sure the answer is YES.
So,if you untick the "Notify me when this connection has limited or no connectivity" checkbox, you will get notified when the problem arise.
But then,if you untick the checkbox,the meaning would be like "Do Not Notify me when this connection has limited or no connectivity".
You will end up wondering that you have fix the problem but it is actually still there.
Am I right or Am I right?

Normally 192.168.1.1 is the IP for your router which is also called the gateway IP.
Just follow the few steps, and try wether it works or not.(The following steps work for the router using 192.168.1.1 IP)

1.Click on Start button>All Programs>Accessories>Communication>Network Connection

click picture to enlarge
Free Image Hosting at www.ImageShack.us


2.Right click the Local Area Connection and go to properties.

click picture to enlarge
Free Image Hosting at www.ImageShack.us


3.Find the entry called "Internet Protocol (TCP/IP)" and double click it. or highlight it then click on properties.

click picture to enlarge
Free Image Hosting at www.ImageShack.us


4.It should be set to "Obtain an IP address automatically", set it to "Use the following IP".

click picture to enlarge
Free Image Hosting at www.ImageShack.us


5.In the IP address field type: 192.168.1.xxx (replace xxx with any number between 2 to 255)
I just choose number 8 because 8 is 'ong' mah, so hopefully it bring luck to solve the problem.

Just click on the Subnet mask field and Windows should fill it in automatically.

In the Default gateway field type: 192.168.1.1 (your modem's gateway IP)
The next radio button should already be set to "Use the following DNS server addresses", if not set it.
In the first field type 202.188.0.133 and 202.188.1.5 for the second field.This is TMNet DNS number.

Close both the open windows with OK. wait for a few seconds or you can off the modem about 10 seconds and on it back.

click picture to enlarge
Free Image Hosting at www.ImageShack.us

Now see if the computer can connect to the network.

###############################################################

*Looking for a good web host? Checkout the Bluehost Review

*Looking for data recovery service? Click here

*Looking for software help desk? Check this out

*Looking for anti spam solutions? Checkout the Syronex

*Looking for broadband phone service provider? Visit this website

Upgrade Mailbox Capacity

Do you know how much is the default capacity of Streamyx mailbox?
Yes, it's just 4MB.
Now, let's steal 6MB of capacity from TMNet into your mailbox,
and make it 10MB. Just follow these simple steps and you will get it for FREE!

1. Visit this website : https://tmbill.tm.net.my/
Key in your TMNet Streamyx username (without @streamyx) and password.
Choose 'Streamyx' for service.

click picture to enlarge
Free Image Hosting at www.ImageShack.us


2. You will be directed to Main Menu page with your name appears as the welcome note.
Scroll down until you find "Subscribe to bigger mailbox for username@streamyx.com"
link under Online Registration.Click it.

click picture to enlarge
Free Image Hosting at www.ImageShack.us


3. On the next page, you can read the pricing list and you can see that the monthly
fee for 10MB is free! Click Next.

click picture to enlarge
Free Image Hosting at www.ImageShack.us


4. Tick the checkbox at the bootom "Yes, I have read and understood the terms and agreement".
Click SUBSCRIBE!

click picture to enlarge
Free Image Hosting at www.ImageShack.us


Now, go to http://webmail.tm.net.my and check your mailbox capacity. Yes, now it's 10MB!

Change Your TMNet Streamyx Password

This will show you on how to change your password for both Streamyx login and email.
*Useful tips: If your modem/router has been configured automatically for auto-dialer,
that means the login password has been configured and saved.
If you change the login password to different pasword, your modem/router
will keep dialing using the old password resulting the connection failure.
So, if you are not sure on how to configure your modem/router, please seek
help from the expert.


1. Visit this website : https://tmbill.tm.net.my/
Key in your TMNet Streamyx username (without @streamyx) and password.
Choose 'Streamyx' for service.

click to enlarge the picture
Free Image Hosting at www.ImageShack.us


2. You will be directed to Main Menu page with your name appears as the welcome note.
Click Change Password link under Account Management

click to enlarge the picture
Free Image Hosting at www.ImageShack.us


3. Please key in the Old Password, New Password and Confirm New Password.
DO NOT CLICK SUBMIT YET!!
Instead, click Individually change password for each services

click to enlarge the picture
Free Image Hosting at www.ImageShack.us


4. Then, you will be directed to another page.
You will see 3 different service type and you can notice there are 3 chechboxes on the
right side. Tick the checkbox if you don't want to change the password for that service.
Key in back the Old Password, New Password and Confirm New Password as entered before.
Now, you can click Update to submit the request.

click to enlarge the picture
Free Image Hosting at www.ImageShack.us


Simple is it?

EZ Net 1315

Did you ever heard about EZnet 1315?

EZnet 1315 is a pre-activated Internet narrowband service and is available to all TM fixed line subscribers nationwide.
TM fixed line subscribers with a PC and narrowband modem may access the Internet by only dialing 1315.
EZnet 1315 gives you an attractive alternative to Internet dial-up access which provides internet connectivity and convenience in one single service.

How much does it cost?

  • Charged at only 4 sen per minute
  • No additional registration or annual fee
  • Charges will be based on usage only, ‘no usage – no charge’

How to connect to 1315 if you have TM homeline installed at your house?Just follow these simple steps:

1.Click on Start button>All Programs>Accessories>Communications>New Connection Wizard

Free Image Hosting at www.ImageShack.us


or alternatively, Go to Control Panel(Classic View)>Double-click on Network Connection>click on Create New Connection Wizard

2. New Connection Wizard window will appears stating "Welcome to the New Connection Wizard" > click on Next

Free Image Hosting at www.ImageShack.us


3. Choose the 1st one- 'Connect to the internet'

Free Image Hosting at www.ImageShack.us


4. Choose the 2nd one- 'Setup my connection manually'

Free Image Hosting at www.ImageShack.us


5. Choose 'connect using a dial-up modem'

Free Image Hosting at www.ImageShack.us


6. Key in the name of the dialer - EZ Net (any name will do)

Free Image Hosting at www.ImageShack.us


7. Phone number- key in 1315

Free Image Hosting at www.ImageShack.us


8. Username and Password - Just leave it blank and tick both checkboxes

Free Image Hosting at www.ImageShack.us


9. Tick another checkbox 'add a shortcut to this connection to my desktop' and hit FINISH button.

Free Image Hosting at www.ImageShack.us


Now,you are ready to connect to EZ Net,just click on the EZ Net icon on your desktop and click connect.That's it!

Hearty Welcome

Dear friends,hearty welcome to StreamyxZone, a blog dedicated to provide better understanding,easy troubleshooting and useful knowledge to all Streamyx users. I take pride in introducing my newly build StreamyxZone blog to all of you.

I would like to assure you that StreamyxZone are far from complete and for the time being,just a simple setting and troubleshooting will be posted.More posting will be added gradually time to time. I hope that this blog will be a good guidance and reference in terms of it's contents which mainly targeted to Streamyx users. I am incredibly proud to be able to share my work in progress, and eagerly anticipate your feedback,comments or suggestions.
Thanks for your time and support.


Click Here for Free Traffic!
Click Here for your Free Traffic!